Overview
The MIROapp allows you to configure MIRO using the Bluetooth interface. The app can be used to start the demonstration software, but also to configure MIRO to connect to your local wireless network by providing network credentials.
I am a demonstrator
If you only want MIRO to run the demo software, you need only look at these sub-sections, which you will find below:
- Installation
- Install the app and connect to your MIRO over Bluetooth.
- Mode selection
- Select mode "demo" and any desired flags (no flags is a great starting point, you can come back to this later if you need to).
- Bridge
- Configure the bridge to autostart when you reboot.
After the above steps, MIRO will start running the demonstrator software automatically each time you turn it on.
I am a developer
The app is also of use to the developer since it allows the network credentials to be configured so that you can subsequently login to your MIRO through the wireless link (MIRO runs an SSH server). Connect to your MIRO, lay in the network credentials, restart the wifi, and you should be ready to connect—the app will also report the IP address you need to connect to MIRO, and/or the MAC address if you need it to configure a static IP address. For information, changes made in the app to bridge configuration and autostart behaviour affect only the content of scripts stored on-board MIRO at ~/bin. See Login to MIRO.
Installation
The MIROapp is supported on Android Marshmallow 6.0 or later. It may run happily on KitKat, also, but this is not supported. The Android device in use must have a BLE (Bluetooth Low Energy) radio attached—recent smart phones and tablets will usually include this component.
The MIROapp can be installed by opening the APK file on your Android device. The APK is available in the MDK under ~/mdk/image/Android, but it will usually be easier to get it onto your device by choosing the MIROapp Direct Download from this page.
~/mdk/image/extern/CREDITS.txt in the MDK for attributions.Connect screen

When you start the MIROapp, it shows the screen to the right, and automatically begins scanning for nearby MIROs. Any that are detected are listed on the screen.
Once your MIRO is detected, you can press and hold its entry on the screen to give it a friendly name that you will remember. We have called ours "My MIRO". You can then click on the entry to connect to that MIRO.
If the scan has finished and you want to re-scan, just click on SCAN.
Management screen
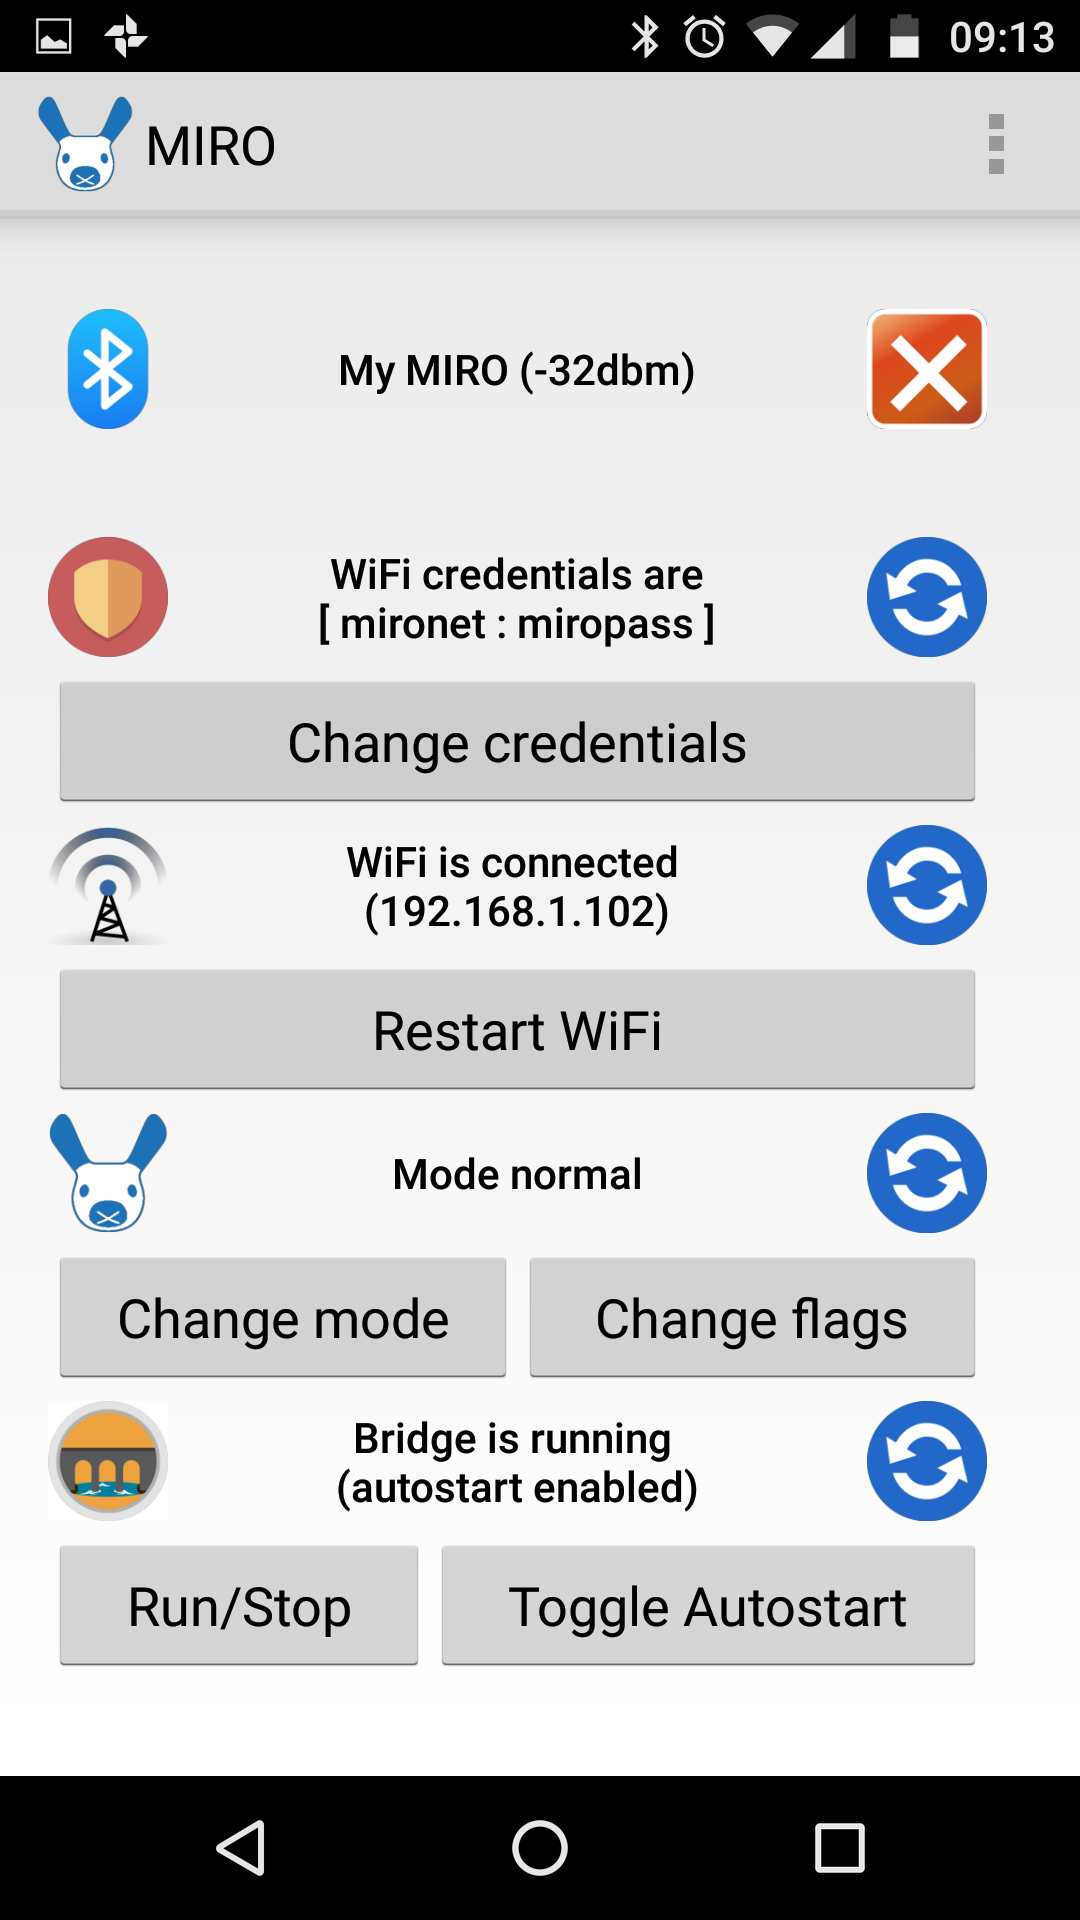
If the app connects successfully, you will then see the screen on the right. From this screen you can manage the high-level behaviour of your MIRO, including how it connects to your local network, and what it starts doing immediately when you turn it on. From top to bottom, the management screen can be understood as a list of somewhat independent sections, as follows.
Bluetooth
The first section of the app reports the Bluetooth connection status. Click on the red cross to disconnect and go back to the connect screen.
Network credentials
If you want MIRO to connect to your local wireless network (you only need this for developing) you can provide your network credentials here. Hit the refresh button to see what credentials are currently stored, or click CHANGE CREDENTIALS to update them. In either case, the stored (or updated) credentials will be displayed and the security icon will light.
Wireless
The next section of the app reports the wireless connection status. If MIRO has valid network credentials, it will connect to the wireless network automatically. If you have only just provided new details, you will need to hit RESTART WIFI before these will take effect.
When the network is connected, the IP address that has been assigned will be displayed and the wireless icon will light. You can also read the MAC address, here—hit the refresh button to switch between displaying IP address and MAC address.
Mode selection
Changes you make in this section will take effect when you next start or restart the bridge (see below).
The next section allows you to configure MIRO's run-time behaviour. Hit the refresh button to see which mode is currently selected.
Change mode
You can click CHANGE MODE to change the mode.
NORMALmode mode is suitable for development—the platform will do nothing unless it receives command signals through the wireless network, or from software running on-board.DEMOmode is suitable to demonstrate the biomimetic software, and will run on its own.CALIBRATEmode is for mechanical assembly or to confirm calibration of mechanical linkages.DIAGNOSTICmode is not yet documented, and should not usually be needed (higher-level access to diagnostics is available on the ROS interface).WORKOUTmode will, one by one, work out MIRO's mechanical DOFs.SHELL RELEASEmode will move MIRO into the shell release configuration (i.e. neck down) so that the body shell can be removed.CONSERVATIVEmode is asNORMALmode, but with some potentially-troublesome features disabled.
Demo flags
If you choose Demo mode, you can also select from a list of flags by clicking on CHANGE FLAGS (see also Wrangling).
SILENTwill prevent MIRO from vocalising, which can make him less annoying in some use cases.DEAFwill make MIRO ignore sound, which is useful in a noisy environment like an exhibition hall. MIRO can otherwise be so distracted by all the noises around him that he just becomes angry and miserable.IMMOBILEwill prevent MIRO from leaving the spot you put him on. In principle, that means you can leave MIRO inDEMOmode on an exposed table-top, and he won't fall off. In practice, small positional errors will accumulate and he will shift over time, so it is not safe to leave him in such a situation unsupervised.LOCKEDwill prevent all movement of the head and neck, which will make MIRO come across as quite a bit more robotic, as well as simplifying his mechanical interactions with the world and the data coming from his sensors.AWAKEwill disable MIRO's natural sleep cycle and ensure that he stays awake, which can be useful for some types of demonstration.NO_RETREATwill disable MIRO's behaviour of retreating (backing off and turning away) when a wheel motor stall is detected, indicating that MIRO's forward motion was blocked. This can be useful if the retreat behaviour is happening too often, or is causing problems in your environment (see alsoNO_SOFT_STALL).SHUN_CLIFFSwill encourage MIRO to turn away from cliffs if they are present in his environment. MIRO's behaviour is always to try not to drive over cliffs (unlessNO_CLIFF_REFLEXbehaviour is enabled), but ifSHUN_CLIFFSis enabled, MIRO will actively turn away from cliffs and look elsewhere.NO_CLIFF_REFLEXwill disable MIRO's normal cliff reflex, which suppresses forward motion if a cliff is detected. This is useful if the floor you are using MIRO on is not sufficiently reflective to be detected by the cliff sensors (some sorts of shiny floor and some sorts of carpet, for example). You will know if the cliff sensors are struggling to see the floor if MIRO is "juddering" or completely failing to move forward, but moves backwards just fine.NO_SOFT_STALLwill disable MIRO's high level wheel motor stall detection. This can be helpful if you are operating on, say, a deep pile carpet, where it is better just to power through and ignore that the motors are struggling to make forward progress. You can see soft stall events because MIRO's body lights flash briefly green when they occur. If you are seeing this all the time, and MIRO's motion is halting as a result, you probably want to try this flag (or move to a smoother surface).SUBMARINEwill turn on sonar feedback, which comprises "pings" indicating range to target such as are familiar from movies about submarines such as The Hunt For Red October with Sir Sean Connery. You will also hear a busy tone when MIRO is suppressing forward motion owing to the presence of an obstacle right in front of his nose. This is a debug flag - if things don't sound right, here, the sonar may be playing up, and you might want to consider usingIGNORE_SONAR. Ok, perhaps we could have called this flagDEBUG_SONAR;).IGNORE_SONARwill turn off MIRO's responses to the sonar in the demo mode. This is helpful if the sonar is not working in the current environment (environments with fabric surfaces or acoustic interference can cause sonar performance to degrade). Try usingSUBMARINEto get some feedback on what the sonar is "seeing".
Bridge
The network bridge is the default on-board software that ships with MIRO. This software bridges the on-board platform interface to the wireless network (exposing the MIRO platform as a ROS node). It is also used to configure the platform—if a mode other than NORMAL or CONSERVATIVE has been chosen, the bridge still needs to be started to engage that mode, but the network side of the interface will not be enabled.
Hit RUN/STOP to toggle the state of the bridge (between running and stopped) and the mode and flags you selected above will take effect. Once you are happy that MIRO is prepared for the role you have in mind, you can click on TOGGLE AUTOSTART so that the bridge starts automatically each time MIRO boots. The configuration you have chosen will be used when MIRO autostarts, also.
NORMAL or CONSERVATIVE mode, the bridge will try to contact the ROS master. If it still fails after ten attempts, it will exit. If you are having problems contacting your MIRO through the ROS interface, click on the refresh button in the bridge section to see if the bridge is still running. Release
If you scroll right to the bottom of the screen, you'll find a gear icon and a refresh button alongside. Once the bridge has been running for a few seconds, clicking on the refresh button will retrieve the release codes for the firmware, respectively, in P1, P2, P2 bootloader, and P3.