Overview
MIRO has an on-board computer that is like any other computer—it needs a little time to startup, and a little time to shutdown safely. Please try not to turn MIRO on and off in quick succession, therefore.
Normal start-up of a MIRO robot is just a matter of turning it on underneath. Some actuators will move a little immediately as they perform their start-up and auto-calibration routines. MIRO's on-board Linux computer (the P3 processor) begins booting once the power is on; once the boot completes, MIRO is ready to use.
Normal shutdown, similarly, is triggered by turning off the switch on MIRO's underside. MIRO will take a few seconds to shut down, when the blue light under the body shell on the left flank will go out, indicating that it is now safe to turn MIRO back on again (or remove its batteries).
Mode
The MIRO robot will start in whichever mode is selected on the red DIP switch under the body shell. This switch controls the mode before the P3 computer is able to take control of the mode. Therefore, it is normal to leave mode 0 (normal mode) selected on the DIP switch, allowing P3 to change the mode later if the user requests it. If this is your first time starting your MIRO, make sure mode 0 is selected now (see this page to learn about setting the mode switch).
On and off
Related FAQ: Why does my MIRO not boot?
Boot
Turn MIRO on underneath to start the boot process.
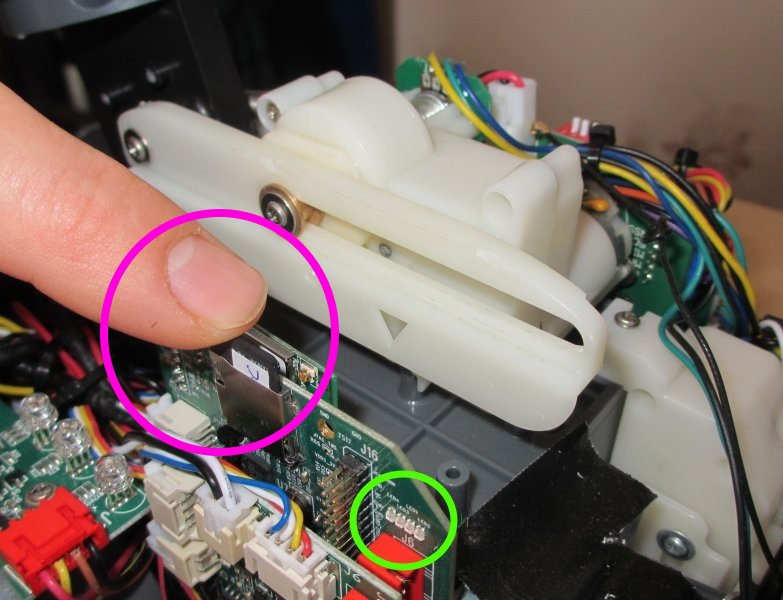
If the body shell is removed, you can monitor the boot process by looking at the indicator lights on the P3 board (green circle, image to left).
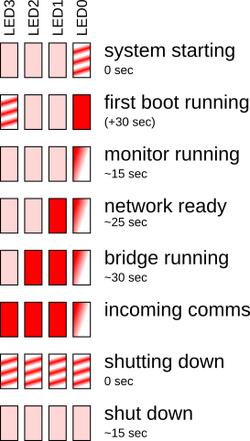
As the kernel loads, LED0 (the one nearest the board edge) begins to flash in a "heartbeat" pattern. When the system status monitor software is brought up, after around fifteen seconds, LED0 changes to flashing at 0.5Hz (monitoring) and the system is now active. It is safe to turn MIRO off once this point has been reached.
Once the monitor is up, the other LEDs will light steadily to indicate a WLAN connection (LED1), that the bridge is running (LED2), and that there are data incoming over the network (LED3). If you have supplied network credentials, LED1 will usually light soon after LED0 begins to flash.
Shutdown
Turn MIRO off underneath to start the shutdown process.
When you power off MIRO at the main switch, a sweeping pattern is shown across all four LEDs to indicate that the system is shutting down. After around fifteen seconds, all the LEDs will go out, including the blue LED which is visible through the body shell if it is attached. At this point, it is safe to remove MIRO's batteries. If you are going to turn MIRO back on again, wait a few seconds before doing so.
First Boot
The first time MIRO starts after delivery (or after updating the system software) it needs to perform a few house-keeping jobs to get itself ready for operation. This process, referred to as "First Boot", happens automatically during startup.
Whilst this process is running, a special light pattern is displayed (see image above) to indicate this. During First Boot, LED0 is lit continuously and LED3 flashes the heartbeat pattern; once First Boot completes, the normal boot pattern, with LED0 flashing heartbeat, returns.
Finalising
If you are commissioning your MIRO for the first time, you should now look at Finalising to tidy up and close up your MIRO.