Overview
Once you are happy that everything is working, you can tidy up inside your MIRO and attach the body shell. Before you do this, you might want to have a quick try with the MIROapp, to make sure you can talk to your MIRO over Bluetooth. If everything checks out, proceed as indicated below.
Tidying up
Use the provided cable ties to organise your wiring, taking particular care to secure any cables away from the six fixing pillars where the body shell will attach. If you have any trouble attaching the body shell, come back to this step and check the fixing pillars are clear of any obstruction.
Engage "shell release" mode
In order to attach or remove the body shell, MIRO's head must be lowered first. Proceed as follows.
Select mode 9, "shell release", and power up. The neck lift will be lowered until the head is forward and down. Power off again once boot has completed, and the neck lift will stay in the down position. Immediately reselect mode 0, but do not turn MIRO on yet.
Reattaching the body shell
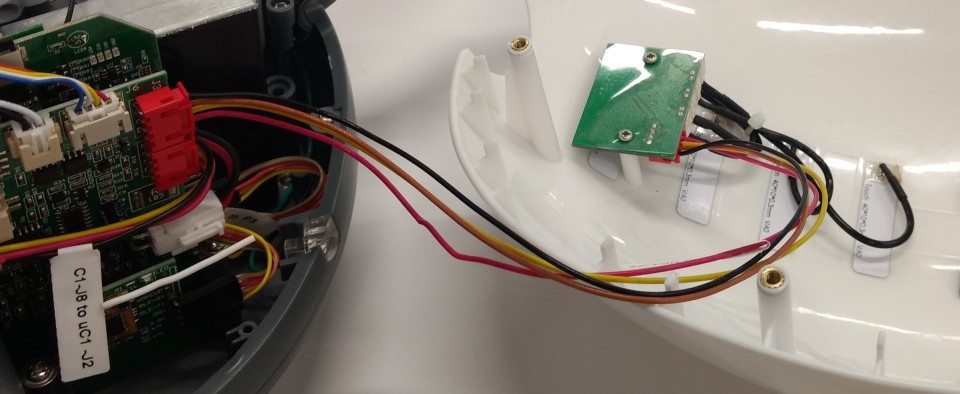
Connect UC1:J3 to UC6:J1 (the board attached to the shell) (see image), and then put the body shell back in place (as you are doing this, locate the white plastic slot guard into the slot in the underside of the body shell, taking care not to apply any undue force). Once the shell is in place, flip MIRO on its back, and secure the body shell by reinserting the screws that were removed from the underside of the body at the beginning of the assembly process.
Connections
| Connector | Cable | Destination | Notes |
|---|---|---|---|
| UC6:J1 | 4-pin | UC1:J3 | Use long black, brown, yellow & red cable connected to the board on the body shell. |